In my college, there is a squid proxy server (10.4.8.204) running on 8080. The firewall on the default gateway drops any packets that are either not coming from proxy, or are not ICMP. Now a days, students use a lot of wireless devices, and many of the famous apps like skype on apple devices, don't honour system proxy settings. So, obviously, students are angry that they can't use their devices to talk to their loved ones, can't play Quizup, can't 'whatsapp' any person, blah, blah. So, I thought why not we put up a transparent proxy for HTTP as well as HTTPS on the wireless router itself, and forget about proxy settings? Transparent HTTP Proxy is easy to find, but such a thing for HTTPS has security issues and what not. One of my seniors, wrote such a software and was happy to share it with the world. I tested this method on one of the TP Link routers, and guess what? It worked! Yay!
A little while later, college authorities enabled 802.1x authentication mechanism. Now the routers cried, as by default, they don't provide any mechanism to authenticate themselves on the WAN port over 802.1x protocol. So, an extra layer of authentication using wpa_supplicant had to be added.
This blog post lists the entire setup done in order to deploy transparent proxies, and authenticate user over 8021.x. In short, as soon as the router is switched on, it keeps sending DHCPDISCOVER packets. The switch understands that it is not interested in 802.1x protocol and throws it into a Guest VLAN. Now, in the Guest VLAN, the router can connect to only one machine in the entire campus, which is basically configured as a tftp server for booting/installing operating systems over network. So, I hosted the required files on this server (10.1.34.345). The router downloads the binary for wpa_supplicant compiled specifically for it's ISA and runs it with the proper configuration, just after restarting the wan service, so that it can ask for a new lease from the DHCP. Now, since it is authenticated, the VLAN is different and the DHCP gives a different IP address. After this, the router downloads pre-compiled binary and configuration files of transparent http and https proxies and runs them in background. PREROUTING rules are configured so that all packets destined for 80 and 443 are redirected to these proxies. Since the code is very new and sometimes segfaults, both the proxies are run in an infinite loop, so that user doesn't have to switch on/off the router again and again.
This method has been tested on
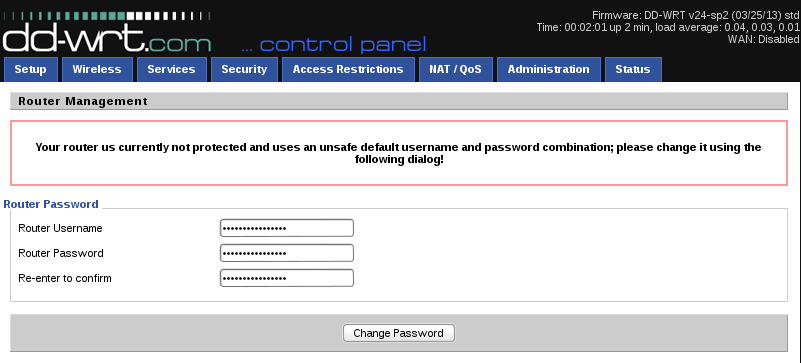
Step 5: After the router restarts, visit 192.168.1.1 in your browser after connecting to the open wifi with ssid dd-wrt
Step 6: Update the username and password.
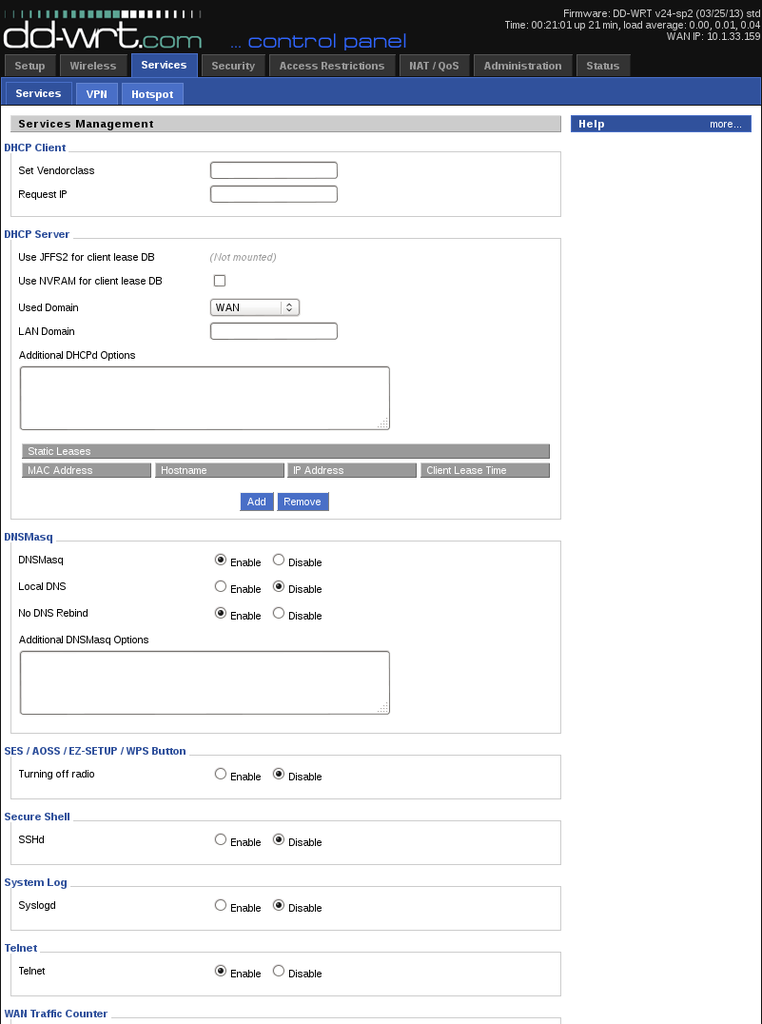
Step 7: Click on the tab: Services and then click on Enable besides Telnet
Step 8: Create a file onrouter.sh and host it on some persistent network reachable from within campus. For example: http://10.4.8.200/~nehal.wani/router_proxy/onrouter.sh. You can download the file here. Contents of the file are:
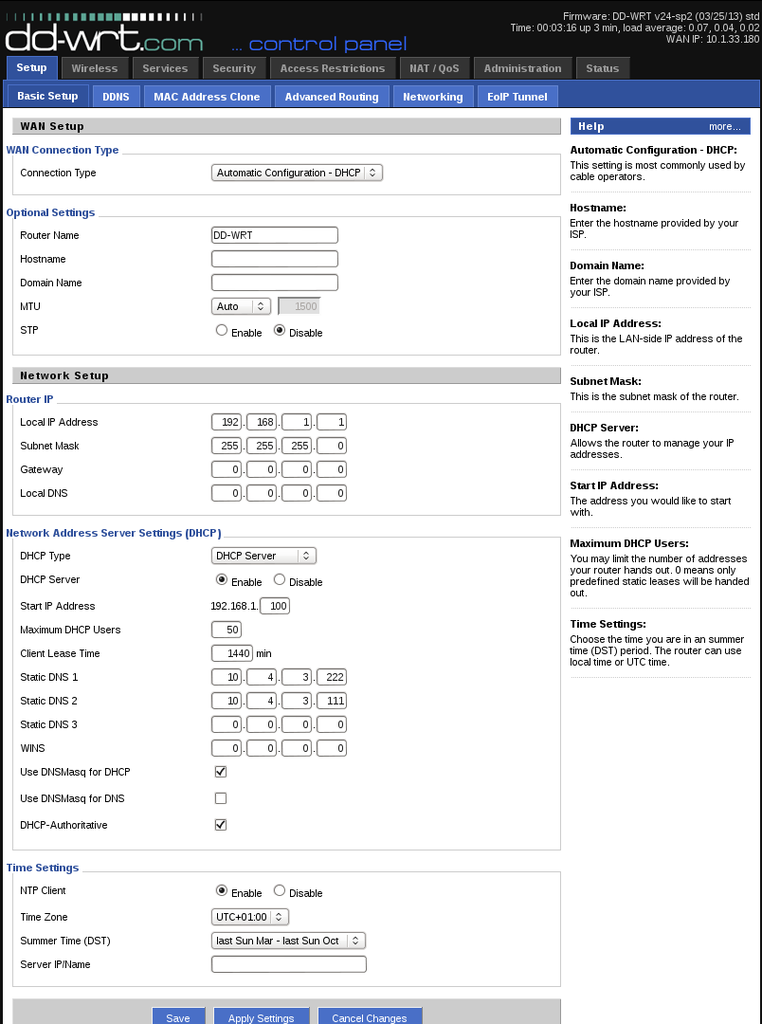
Step 10: Open 192.168.1.1 in your browser and go to Setup -> Basic Setup. In Connection Type, choose Automatic Configuration - DHCP. In the section Network Address Server Settings (DHCP), deselect Use DNSMasq for DNS and enter 10.4.3.222 and 10.4.20.204 in Static DNS 1 and Static DNS 2. Click Save at the bottom of the page.
Step 11: Find the program wpa_supplicant supporting your device's chipset and ISA. For TPLink-WR740N v4.28, I found the binary in this package. Mirror and host it one of the nodes which is almost always connected to the private network created by the router. For example, http://192.168.148.1/wpa_supplicant_mips32
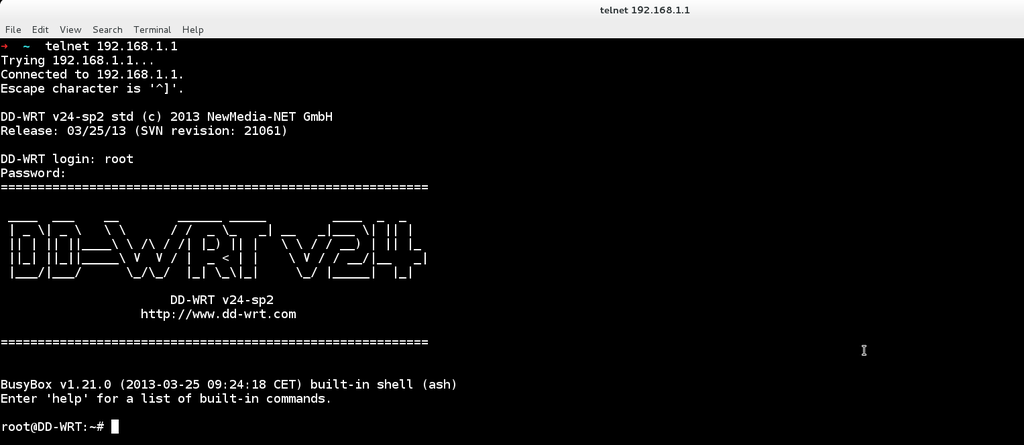
Step 12: Telnet into the router and type the following commands (Change the links of the hosted files appropriately):
A little while later, college authorities enabled 802.1x authentication mechanism. Now the routers cried, as by default, they don't provide any mechanism to authenticate themselves on the WAN port over 802.1x protocol. So, an extra layer of authentication using wpa_supplicant had to be added.
This blog post lists the entire setup done in order to deploy transparent proxies, and authenticate user over 8021.x. In short, as soon as the router is switched on, it keeps sending DHCPDISCOVER packets. The switch understands that it is not interested in 802.1x protocol and throws it into a Guest VLAN. Now, in the Guest VLAN, the router can connect to only one machine in the entire campus, which is basically configured as a tftp server for booting/installing operating systems over network. So, I hosted the required files on this server (10.1.34.345). The router downloads the binary for wpa_supplicant compiled specifically for it's ISA and runs it with the proper configuration, just after restarting the wan service, so that it can ask for a new lease from the DHCP. Now, since it is authenticated, the VLAN is different and the DHCP gives a different IP address. After this, the router downloads pre-compiled binary and configuration files of transparent http and https proxies and runs them in background. PREROUTING rules are configured so that all packets destined for 80 and 443 are redirected to these proxies. Since the code is very new and sometimes segfaults, both the proxies are run in an infinite loop, so that user doesn't have to switch on/off the router again and again.
This method has been tested on
- TP-Link WR740N v4.27
- D-Link DIR-600
Content taken from: Transparent HTTP Proxy and Transparent HTTPS Proxy
Github Repo: router_tproxy
Step 1: Visit DD-WRT Downloads page and enter WR740N. Since my device version is 4.27, I should click on 4.x then download factory-to-ddwrt.bin Mirror
Step 2: Perform a 30-30-30 Hard Reset on your router.
Step 3: Visit 192.168.0.1 in your browser after connecting your device with the router. The IP address may be different, depending upon your router.
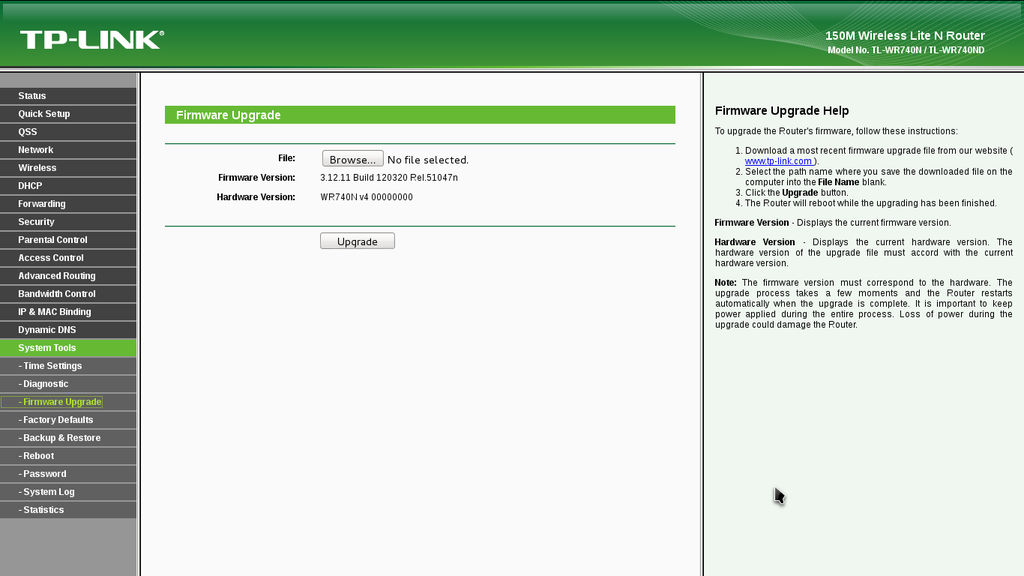
Step 4: Upload the downloaded file to: System Tools -> Firmware Upgrade and click Upgrade

Step 5: After the router restarts, visit 192.168.1.1 in your browser after connecting to the open wifi with ssid dd-wrt
Step 6: Update the username and password.

Step 7: Click on the tab: Services and then click on Enable besides Telnet

Step 8: Create a file onrouter.sh and host it on some persistent network reachable from within campus. For example: http://10.4.8.200/~nehal.wani/router_proxy/onrouter.sh. You can download the file here. Contents of the file are:
# iptables commands to be run on DD-WRT for tproxyhttps intercepting
# Note your router setup may differ , use only as a guide
cd /tmp/tmpf/

LAN_IP=`nvram get lan_ipaddr`
LAN_NET=$LAN_IP/`nvram get lan_netmask`

## HTTPS Stuff
# IP address of machine on which the intermediate transparent https proxy (tproxyhttps)
# is running (if you are running tproxyhttps on the router itself, then this is the router's ip)
PROXY_IP=192.168.1.1
PROXY_PORT=1125 # Port on which the intermediate transparent http proxy listens for requests
iptables -t nat -A PREROUTING -i br0 -s $LAN_NET -d $LAN_NET -p tcp --dport 443 -j ACCEPT
iptables -t nat -A PREROUTING -i br0 -p tcp --dport 443 -j DNAT --to $PROXY_IP:$PROXY_PORT

chmod a+x /tmp/tmpf/tproxyhttps
echo "while true; do /tmp/tmpf/tproxyhttps -s 10.4.8.204 -a 8080 -p $PROXY_PORT -v &> /tmp/tmpf/tproxyhttps.log ; done" >> /tmp/tmpf/script_https.sh
chmod a+x /tmp/tmpf/script_https.sh
sh script_https.sh &

## HTTP Stuff
# IP address of machine on which the intermediate transparent http proxy (tinyproxy)
# is running (if you are running tinyproxy on the router itself, then this is the router's ip)
PROXY_IP=192.168.1.1
PROXY_PORT=3128 # Port on which the intermediate transparent https proxy listens for requests
iptables -t nat -A PREROUTING -i br0 -s $LAN_NET -d $LAN_NET -p tcp --dport 80 -j ACCEPT
iptables -t nat -A PREROUTING -i br0 -p tcp --dport 80 -j DNAT --to $PROXY_IP:$PROXY_PORT

chmod a+x /tmp/tmpf/tinyproxy
echo "while true; do /tmp/tmpf/tinyproxy -c tp.conf &> /tmp/tmpf/tp.log ; done" >> /tmp/tmpf/script_http.sh
chmod a+x /tmp/tmpf/script_http.sh
sh script_http.sh &

# All SNAT Stuff
iptables -t nat -I POSTROUTING -o br0 -s $LAN_NET -d $PROXY_IP -p tcp -j SNAT --to $LAN_IP
iptables -I FORWARD -i br0 -o br0 -s $LAN_NET -d $PROXY_IP -p tcp --dport $PROXY_PORT -j ACCEPT

# Don't route the local network packets through intermediate proxies
iptables -t nat -I PREROUTING -i br0 -d 192.168.36.0/24 -j ACCEPT
iptables -t nat -I PREROUTING -i br0 -d 10.0.0.0/13 -j ACCEPT

# add search domain option for intranet domains
echo "dhcp-option=option:domain-search,iiit.ac.in" >> /tmp/dnsmasq.conf
stopservice dnsmasq
startservice dnsmasq
Step 9: Compile the file tproxyhttps.c for the Instructions Set Architecture of your router. For TPLink-WR740N, the chipset is of Atheros and ISA is MIPS32. Host the compiled binary on some persistent network reachable from within campus. For example: http://10.4.8.200/~nehal.wani/router_proxy/tproxyhttps. You can download the compiled binary for TPlink-WR740N here. If you wish to compile it yourself, download OpenWRT-toolchain-for-mips-gcc Mirror. If your router model is D-Link DIR-600, then you need to download OpenWRT-toolchain-for-ramips-gcc Run this command for compilation:
mips-openwrt-linux-gcc tproxyhttps_working.c -ldl -lpthread -o tproxyhttpsThe binary can be found in: ./OpenWrt-Toolchain-ar71xx-for-mips_r2-gcc-4.6-linaro_uClibc-0.9.33.2/toolchain-mips_r2_gcc-4.6-linaro_uClibc-0.9.33.2/bin/ Similar command can be used to compile transparent http proxy. The files required are:
- tinyproxy. Pre-compiled binary extracted from this link
- tp.conf (tinyproxy config file)
Step 10: Open 192.168.1.1 in your browser and go to Setup -> Basic Setup. In Connection Type, choose Automatic Configuration - DHCP. In the section Network Address Server Settings (DHCP), deselect Use DNSMasq for DNS and enter 10.4.3.222 and 10.4.20.204 in Static DNS 1 and Static DNS 2. Click Save at the bottom of the page.

Step 11: Find the program wpa_supplicant supporting your device's chipset and ISA. For TPLink-WR740N v4.28, I found the binary in this package. Mirror and host it one of the nodes which is almost always connected to the private network created by the router. For example, http://192.168.148.1/wpa_supplicant_mips32
Step 12: Telnet into the router and type the following commands (Change the links of the hosted files appropriately):

root@DD-WRT:~# nvram set rc_startup="
mkdir /tmp/tmpf
cd /tmp/tmpf
while true; do ifconfig | grep -A2 eth0 | grep inet; if [[ \$? -ne 0 ]]; then sleep 1; else break; fi; done #wait for Guest VLAN IP
wget http://10.1.34.245/softwares/RouterFiles/wpa_supplicant_mips32 #download from local network
mv wpa_supplicant_mips32 wpa_supplicant
chmod a+x wpa_supplicant
echo \"
ctrl_interface=/var/run/wpa_supplicant
ap_scan=0
fast_reauth=1
network={
    key_mgmt=IEEE8021X
    eap=GTC
    identity=\\\"nehal.wani@students.iiit.ac.in\\\"
    password=\\\"i-wont-tell-you\\\"
}\" > /tmp/tmpf/wpa_supplicant.conf
./wpa_supplicant -D wired -i eth0 -dd -c /tmp/tmpf/wpa_supplicant.conf &> /tmp/wpa_supplicant.log &
sleep 10 #wait for authentication to complete
stopservice wan
startservice wan
sleep 10 #wait for IP from DHCP
wget http://10.4.8.200/~nehal.wani/router_proxy/onrouter.sh;
wget http://10.4.8.200/~nehal.wani/router_proxy/tproxyhttps;
wget http://10.4.8.200/~nehal.wani/router_proxy/tinyproxy;
wget http://10.4.8.200/~nehal.wani/router_proxy/tp.conf;
sh onrouter.sh;" #This set the the nvram variable rc_startup
root@DD-WRT:~# nvram commit #Save the nvram variable, so that it is persistent w.r.t reboots.
root@DD-WRT:~# reboot #Reboot to apply changes
No comments:
Post a Comment