How To Dual Boot Windows & Ubuntu 12.04 In Sony Vaio/ HP dv6 Laptops With GPT-EFI Partition or Dynamic Partition
How To Convert Dynamic to Basic Partition Without Loss Of Data
This is a common issue in most of the latest HP and Vaio Laptops. These guys have the following issue:
(i) Vaio guys have used GPT-EFI configuration for their hard drives whereas the old and friendly used to be MBR-BIOS configuration.
(ii) HP guys already have enough number of primary partitions and Linux can't be installed easily (as long as you don't want wubi). So naturally, while shrinking your hard disk in Windows 7, you generally get an option to change to Dynamic Configuration. There you go! Once clicked, it is very difficult to revert back. But this is where the important use of two awesome tools gdisk and testdisk chips in.
I'll be focusing on correcting or rather 'suitableizing' your hard disk configuration for easy Linux installations and get rid of crappy partitions of which there is no need at all. I'll provide the links for the rest of the steps as we go.
The process:
Part 1: Converting GPT-EFI to MBR-BIOS. For this method, you can perform the required set of operations in windows itself. But changing hex-values of a partition while it is mounted, puff! Therefore, I'll use the live-mode of Ubuntu.
(i) Creating Live Mode USB: To use Live Mode of Ubuntu, all you need is a USB Drive having enough space to hold a 700MB file. Go through this: http://www.ubuntu.com/download/help/create-a-usb-stick-on-windows Now, that you have a bootable USB, reboot your system (Yeah, by reboot I mean shutdown and then boot, not hibernate and boot!)
(ii) Booting From USB: Now usually, one can boot from USB in Laptops easily. In Vaio Laptops, you'll have to go to the BIOS options by pressing F2. Then, you have to switch from UEFI Mode to Legacy Mode and Enable Booting From External Drives. In HP, one can boot from USB just by pressing F9 and going to Boot Menu.
(iii) Installing gdisk: Note, you should have a working internet connection in order to perform this, otherwise, you can download the required packages before-hand and store them somewhere.
Open pkgs.org
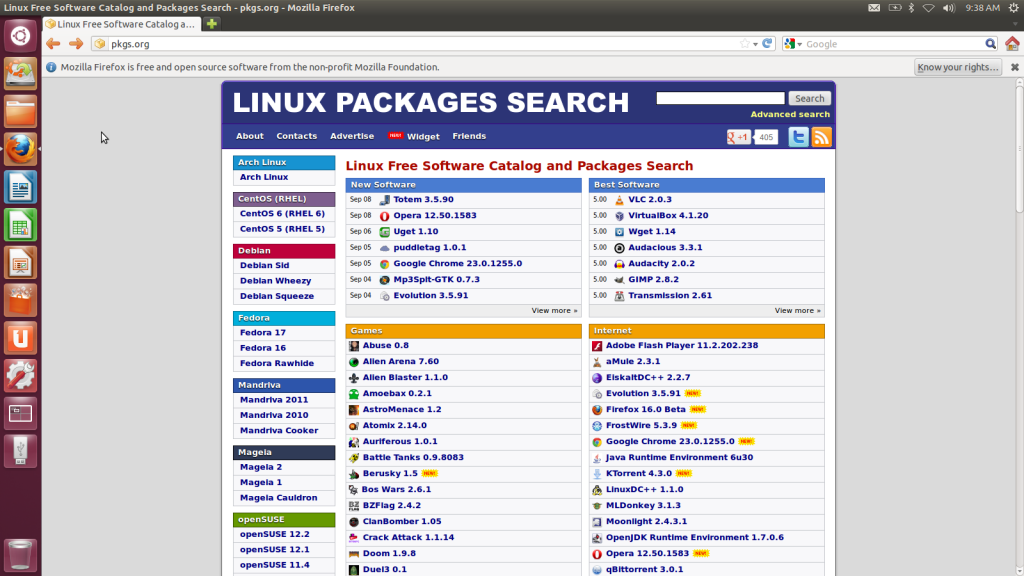
Search for gdisk
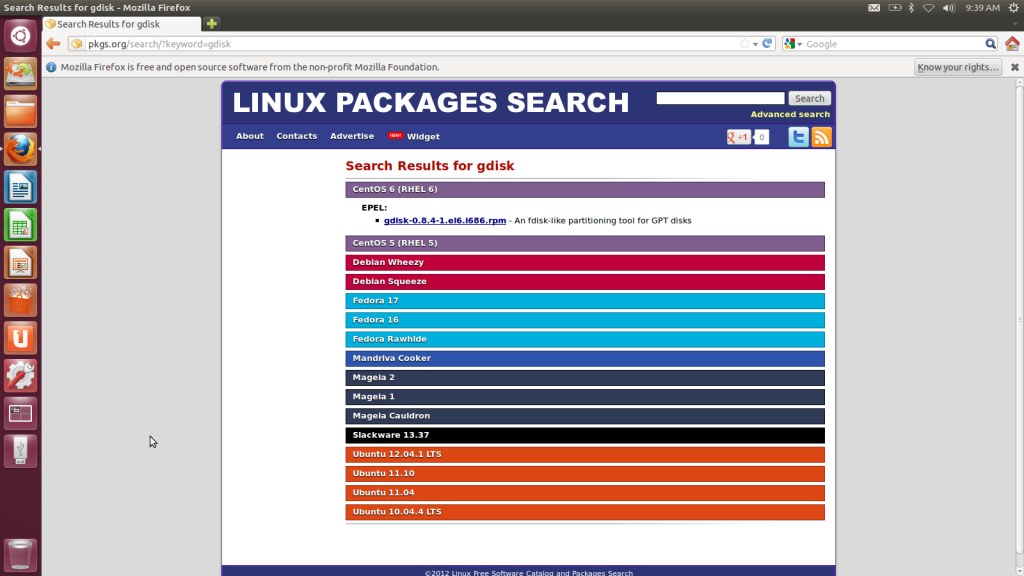
Click on Ubuntu 12.04.1 LTS
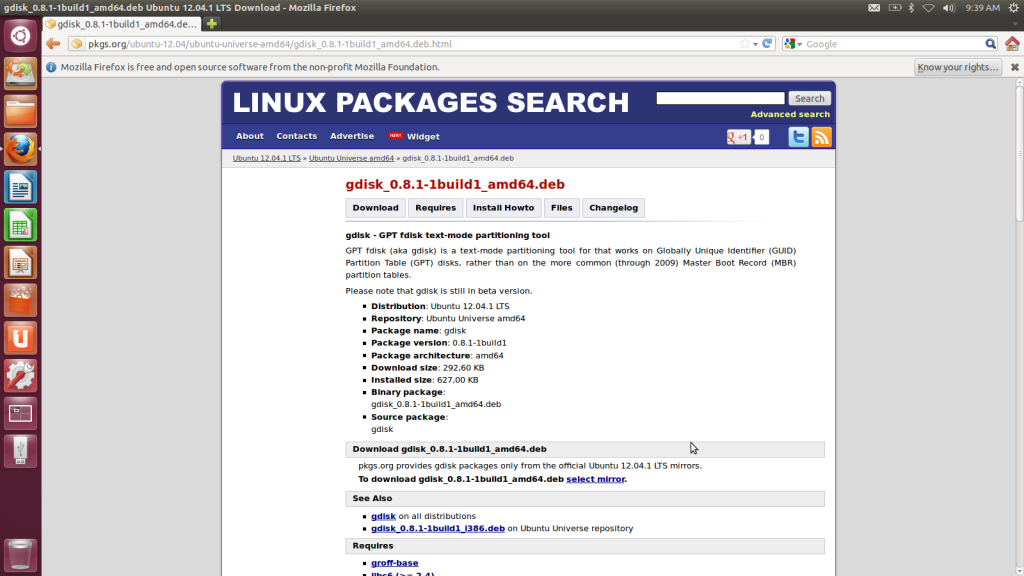
Now, if you have a 32-bit image of Ubuntu, then click on the i386 file but if you have the 64-bit image of Ubuntu, then click on select mirror.
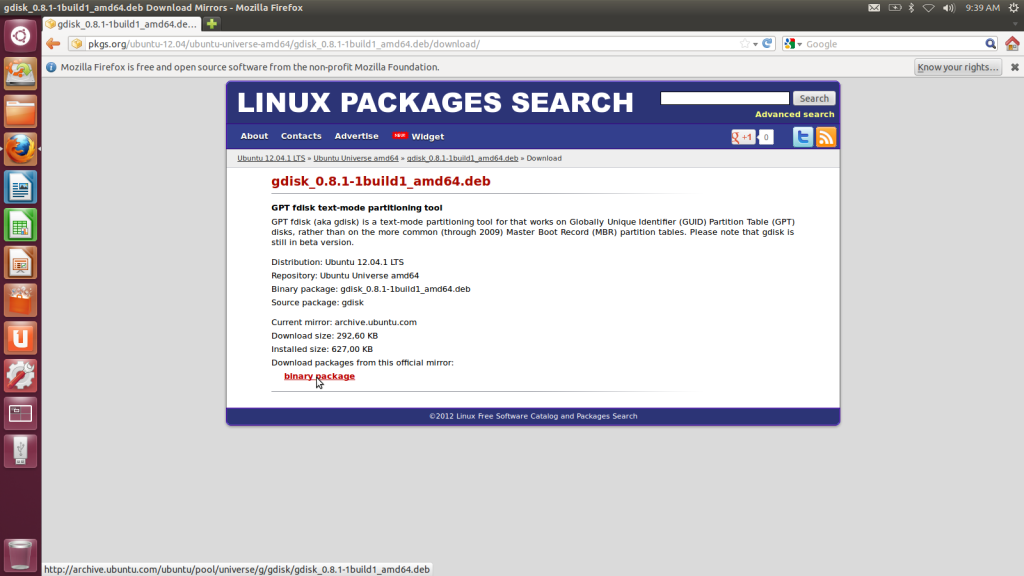
Download the binary package.
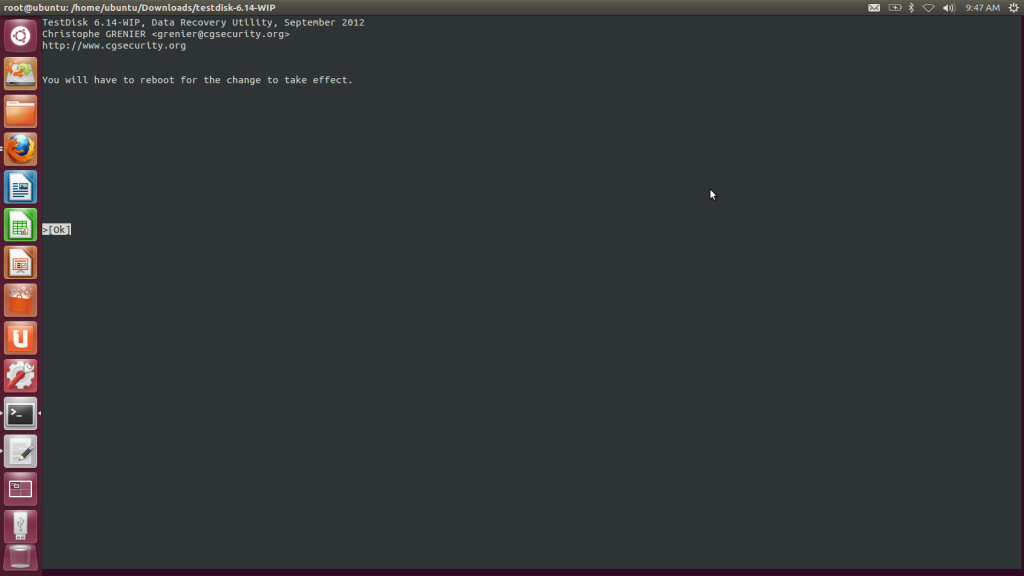
(iv) Installing testdisk:
Google testdisk :)
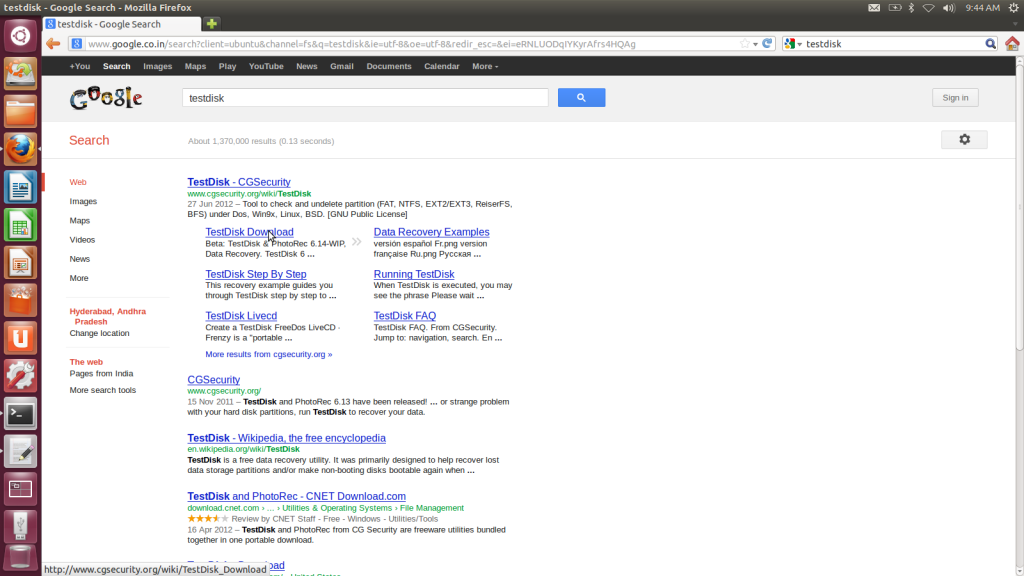
Open the download page of CGISecurity
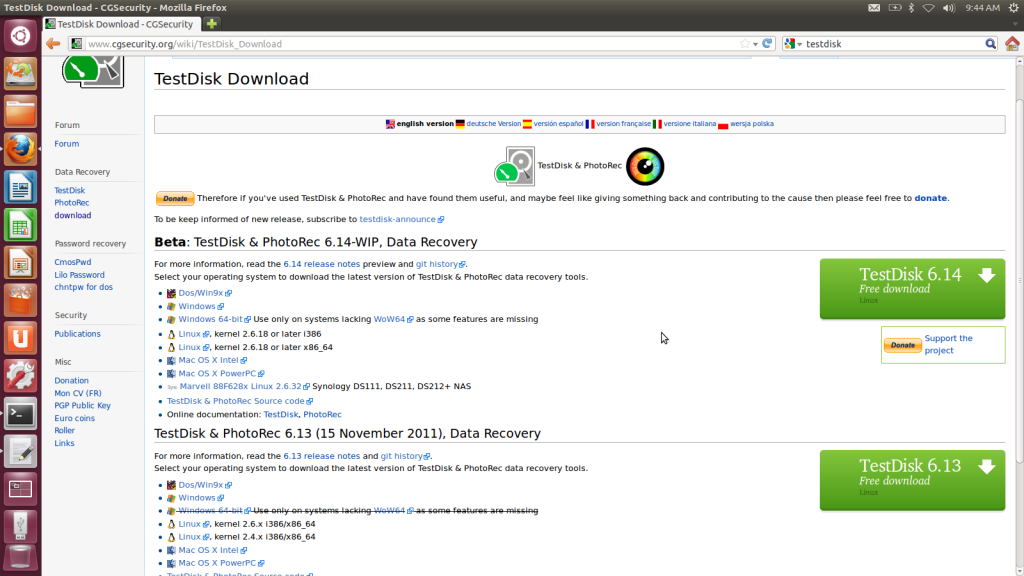
Click on Linux, kernel 2.6.18 or later (again, 32-bit=i386 and 64-bit=x86_64) Let the download complete!
Alternatively, one can download gdisk from https://docs.google.com/open?id=0B8d4Lb_KJbfdd1Yxd25ObWxub0E
and testdisk from https://docs.google.com/open?id=0B8d4Lb_KJbfdTUNTZlpjc0Q3d0k
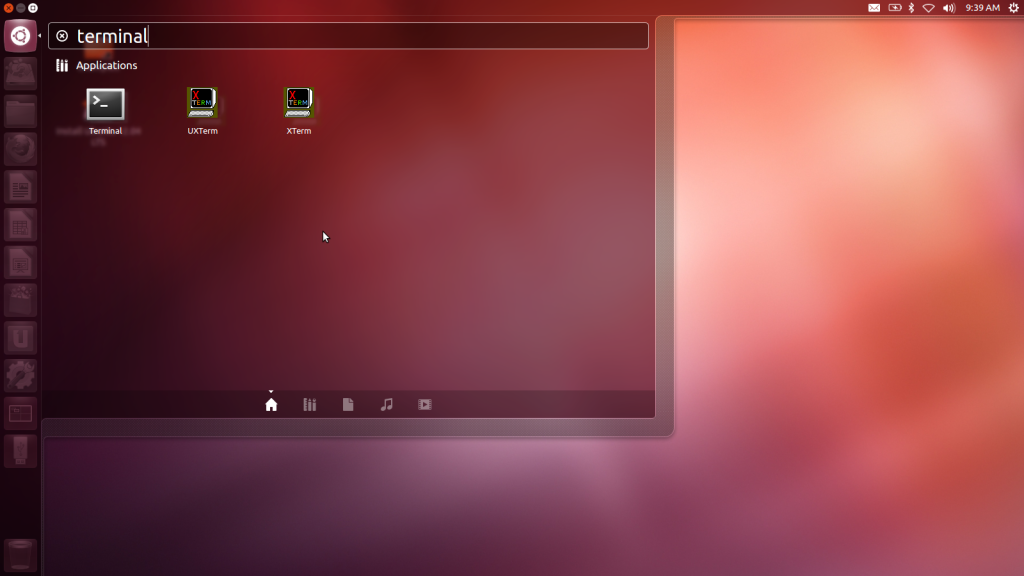
(v) Time to open a terminal: Press the Windows Key and type terminal
(vi) Time to write some commands:
We'll basically open gdisk, go into expert mode and delete GPT partition tables and write MBR.
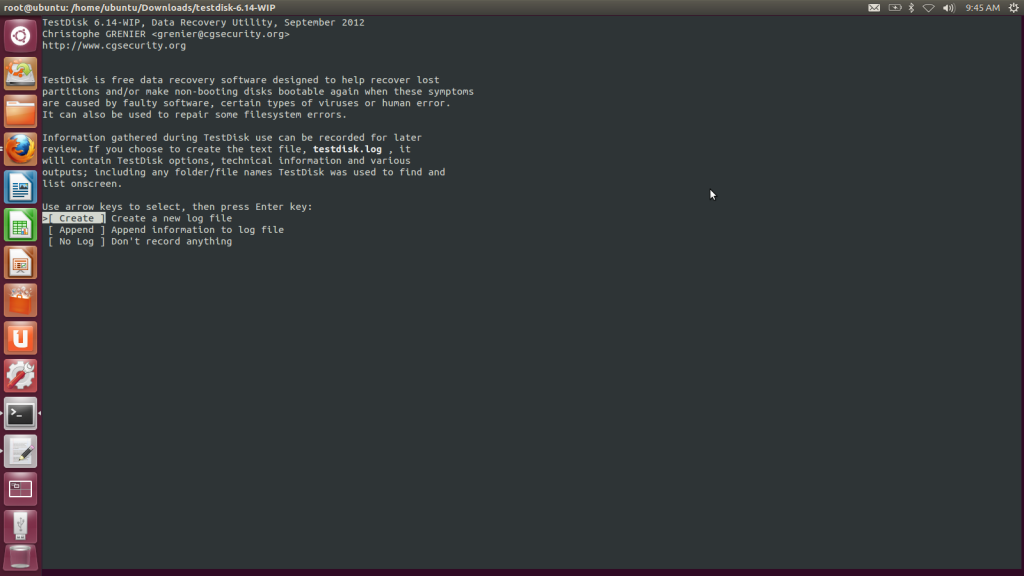
(vii)Now that the disk has been converted to MBR, one needs to recover any partitions that have been lost and mark them as primary. For which, we'll use testdisk.
Select Create & Press Enter
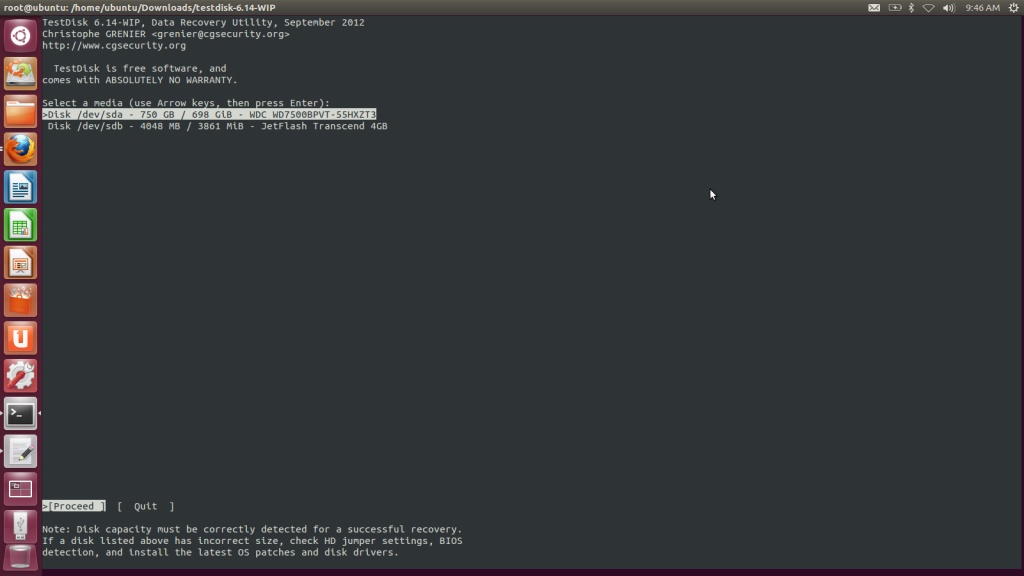
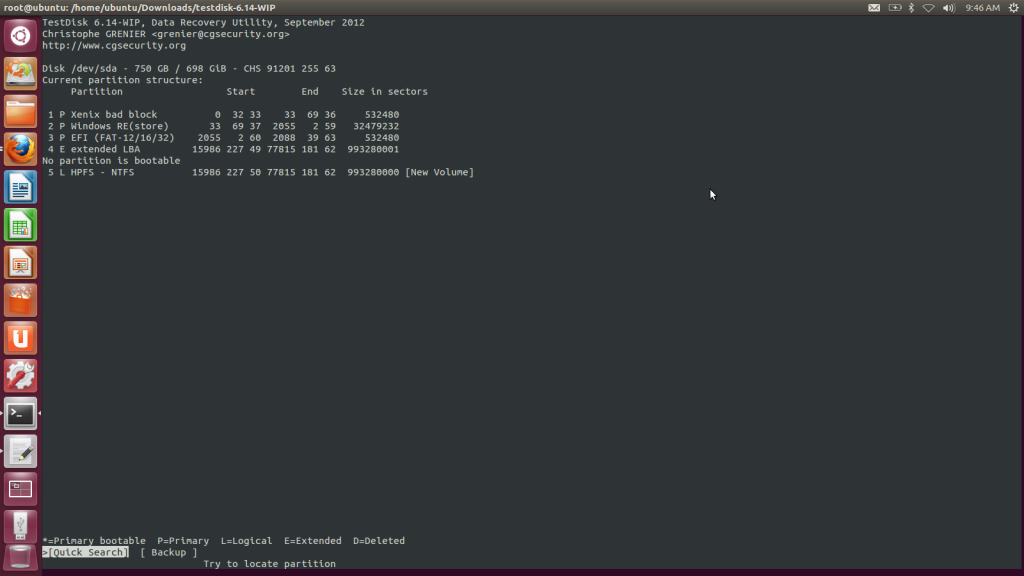
Select the hard disk in which your Windows, Recovery, etc partitions are present. In most cases it will be /dev/sda. Select proceed and press Enter
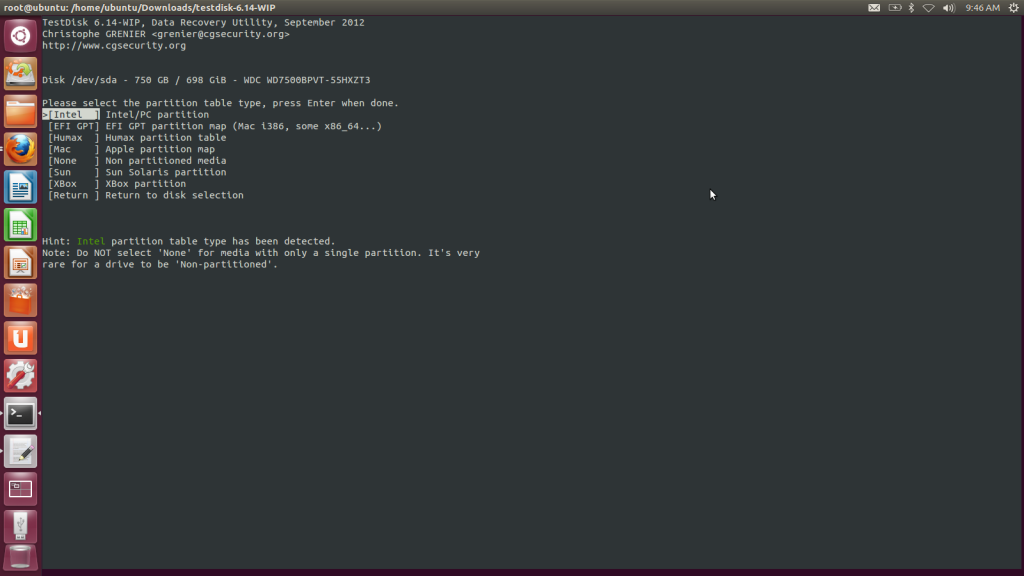
Whatever the by-default option is, select it. (TestDisk automatically detects the Hard Disk and makes the appropriate option as default-highlighted). Since the EFI-GPT Combo data-structures have been deleted by gdisk, Intel is the by default highlighted option in this case.
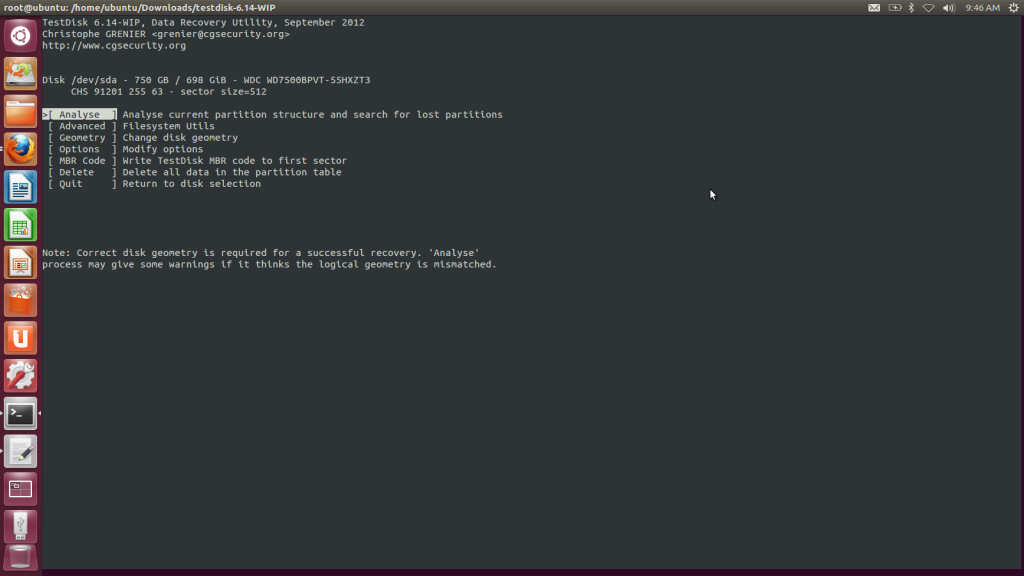
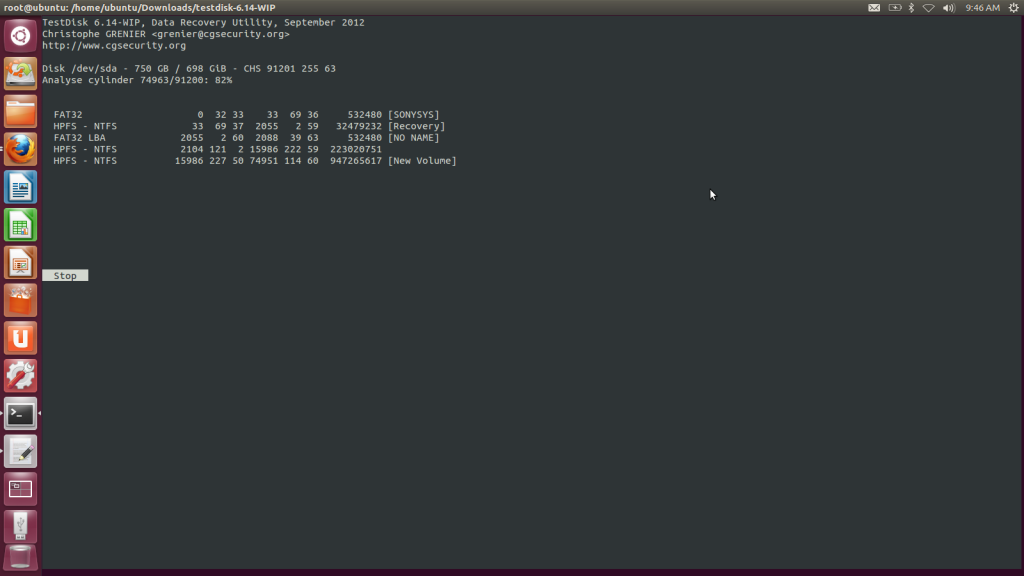
Select Analyze and press Enter
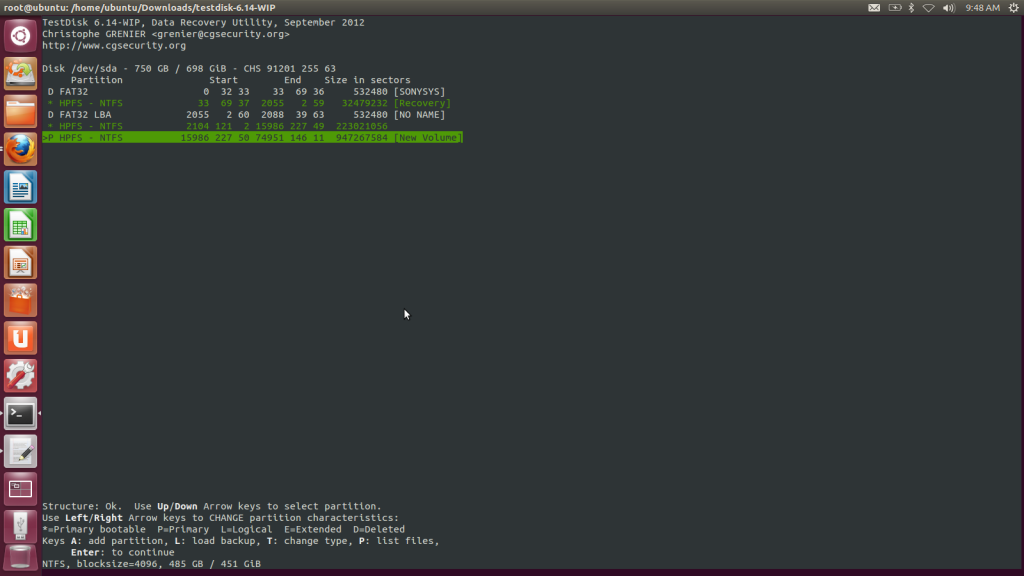
OK, so in the case of Vaio (after using gdisk), Partition 1 and Partition 3 are no longer needed. Because these contain info about booting from GPT-EFI partitions. Select Quick Search and press Enter
Hit Stop when all the required partitions have been displayed.
Now select the Recovery Partition & press the side arrow key until * appears. Do the same for your C: Drive. But for the D: Drive (If you have any) choose P.
This will show the list of partitions that you actually want at last. Select write and press Enter.
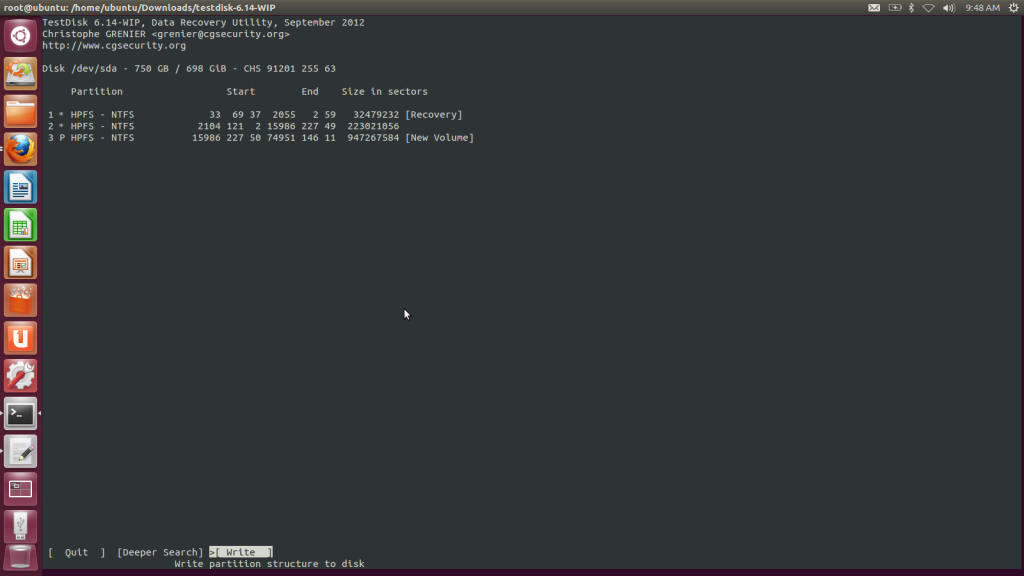
Everything seems to be done. The partition Structure has been written into the hard disk.
Part 2: Moving/Re-Sizing Hard Disk Partitions: This is required so that error like "This partition does not start at any physical boundary" don't occur while installing Linux.
(i) Download the GParted Live iso file: http://gparted.sourceforge.net/download.php
(ii) Download and install LinuxLive USB Creator http://www.linuxliveusb.com/ on your MS Windows computer.
(iii) From Windows, install then run the LinuxLive USB Creator program and follow the instructions in the GUI to install GParted Live on your USB flash drive
(iv) Boot From USB and follow the instructions:
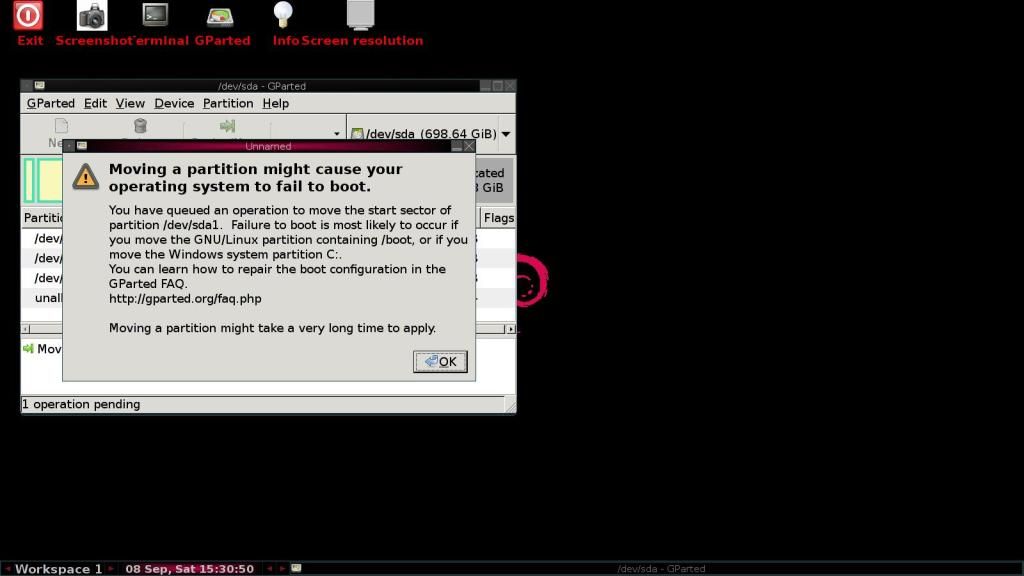
Keep pressing enter until a screen similar to this appears. Now re-size the first partition and add the space before and after it. You'll get a warning message like this one, but its normal.
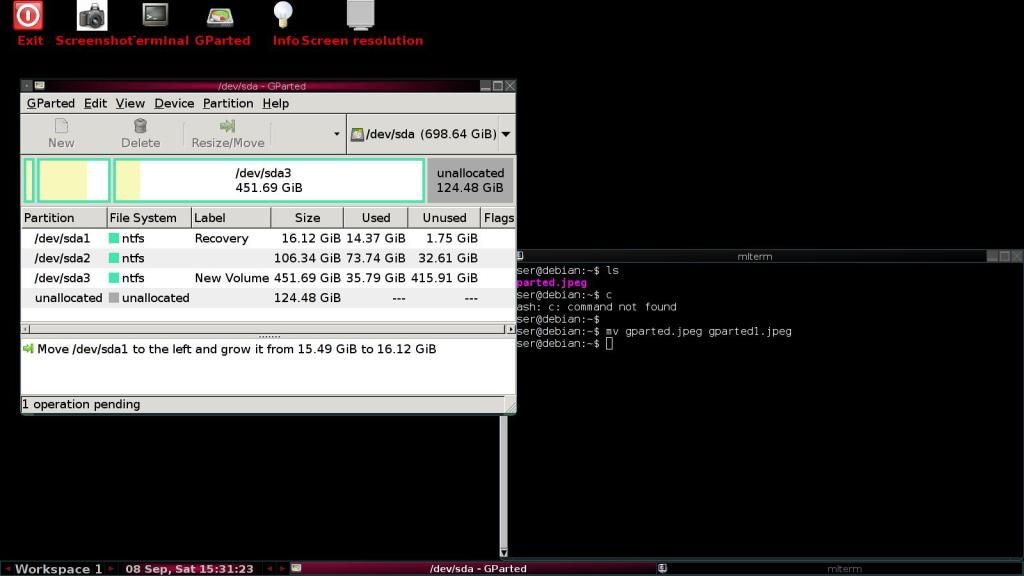
The layout should look like this. Then click on edit and then on "apply all actions".
Intermediary Process: First, The partition is expanded
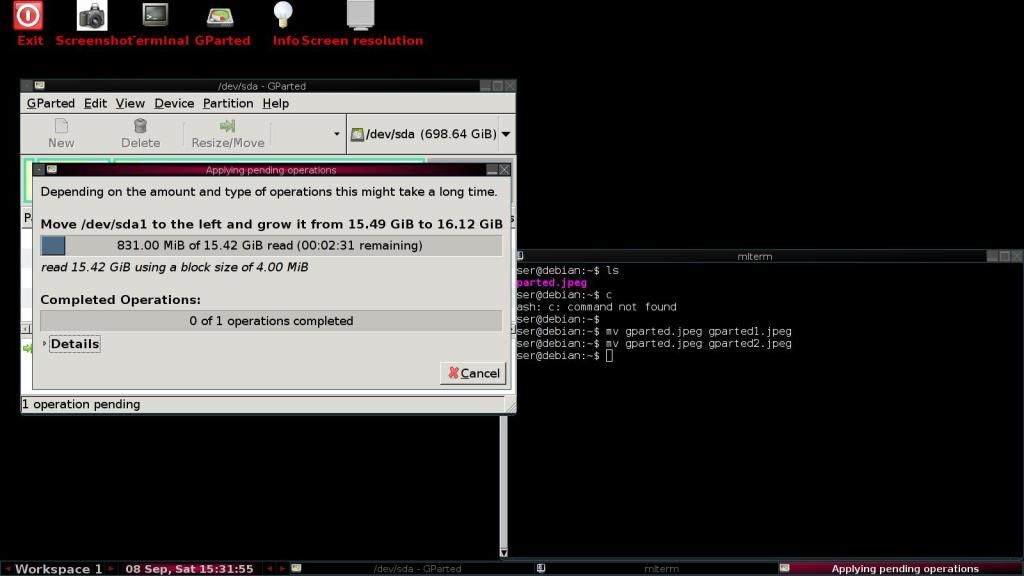
Intermediary Process: Second, data is copied from later sectors to previous ones.
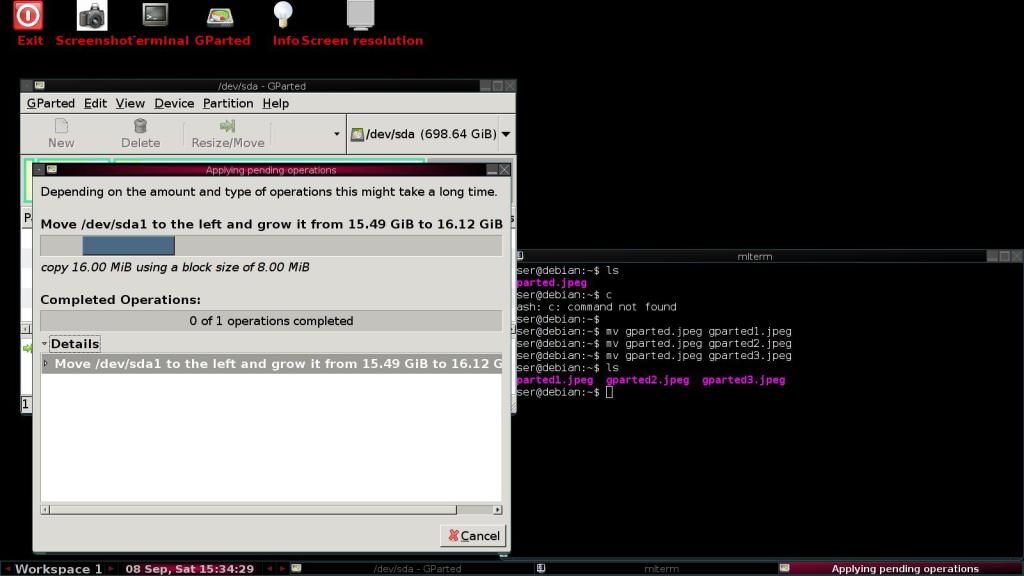
Intermediary Process: Still Copying
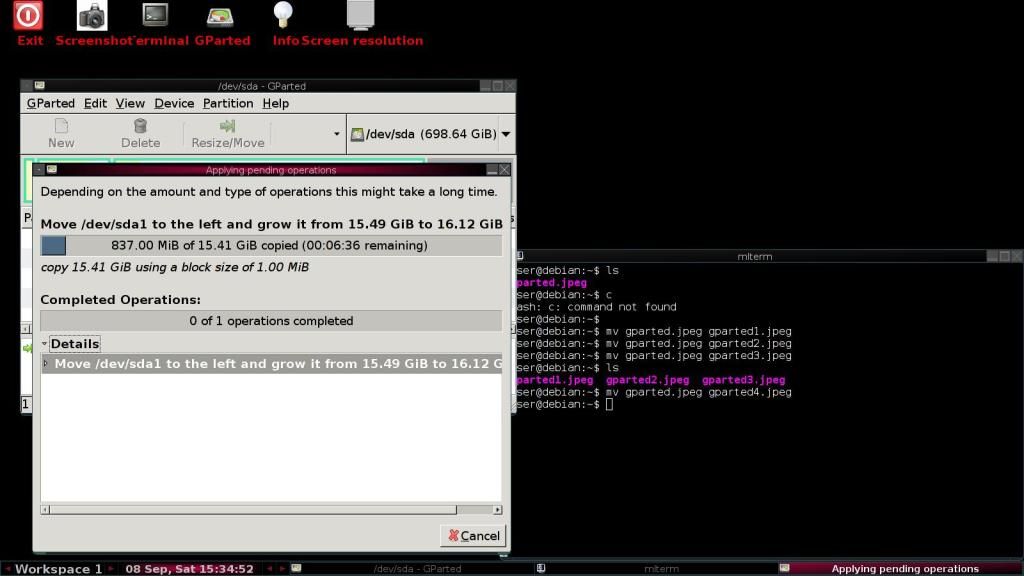
Intermediary Process: Almost finished copying files.

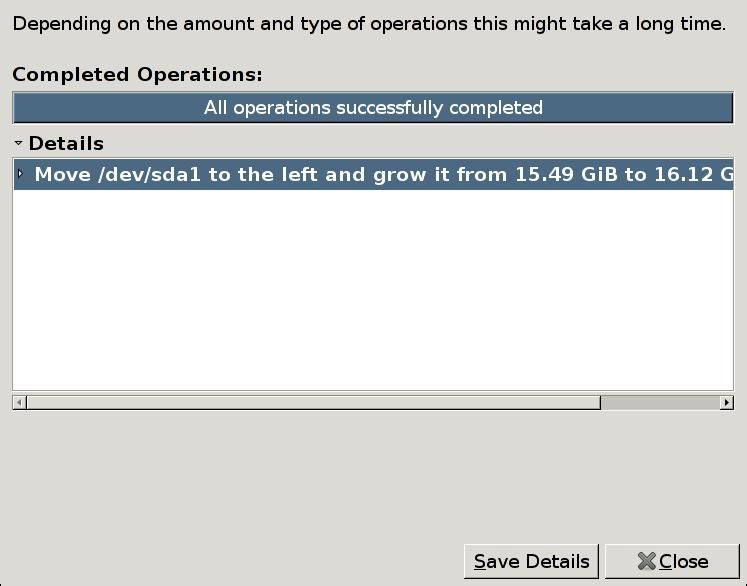
Copying finished! Hurray!
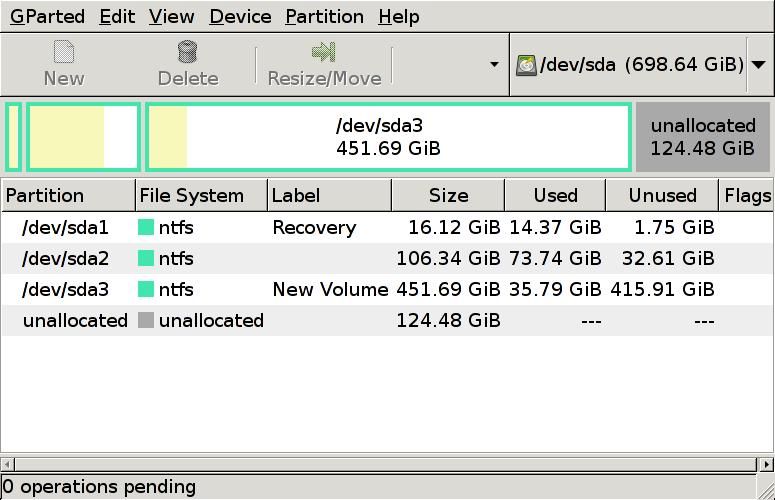
The final layout will look something like this.
Part 3: Recovering Master Boot Record of Windows. This is essential to boot Windows. The destruction of GPT-Partition tables destroys the boot info and hence it needs to be restored. In order to do this, there are many techniques available. But we'll follow the one mostly used and which is the safest. i.e. let Microsoft repair it's own product!
(i) Download the iso of the Windows 7 Version you have from :
http://forums.mydigitallife.info/threads/18769-Download-Windows-7-ISO-(Official-32-bit-and-64-bit-Direct-Download-Links)
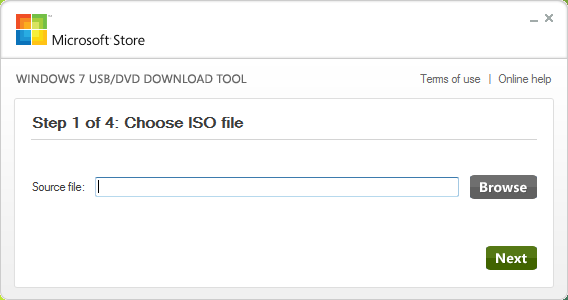
(ii) Download and Install Windows 7 USB/DVD download tool from : http://images2.store.microsoft.com/prod/clustera/framework/w7udt/1.0/en-us/Windows7-USB-DVD-tool.exe
Run the program. Click browse to select the image file that you have downloaded.
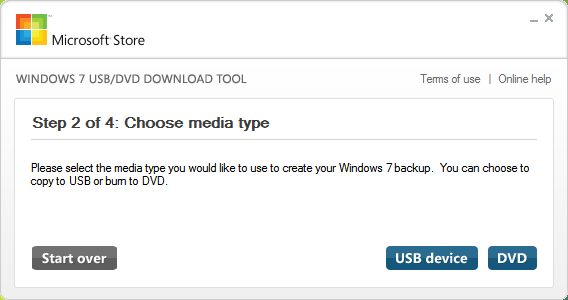
Click on USB Device
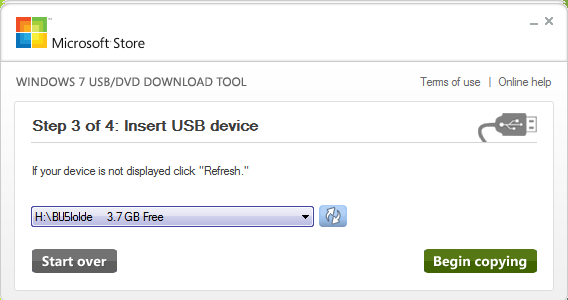
Select Which USB Device you want to copy files to.
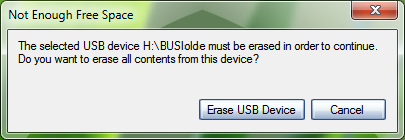
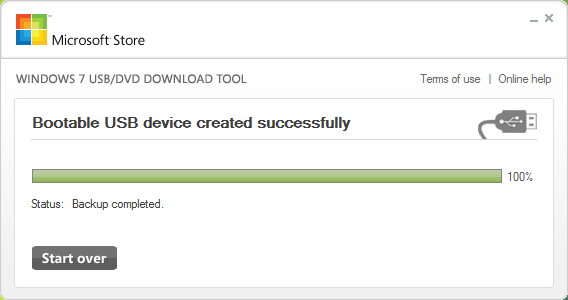
If there is not enough space on your USB Device, backup its data and click Erase USB Device
Wait for the process to finish.
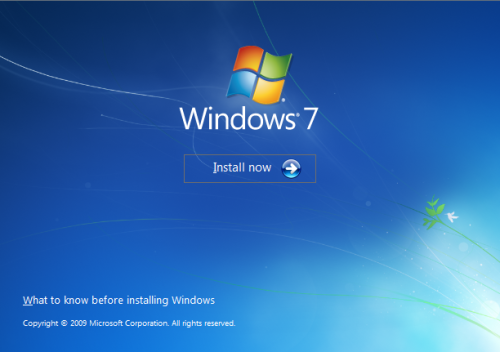
Boot From USB. Select Install Now
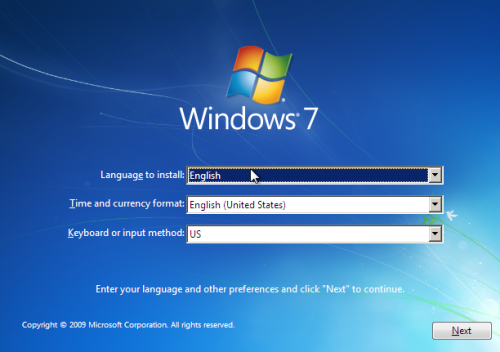
Select your language & click next.
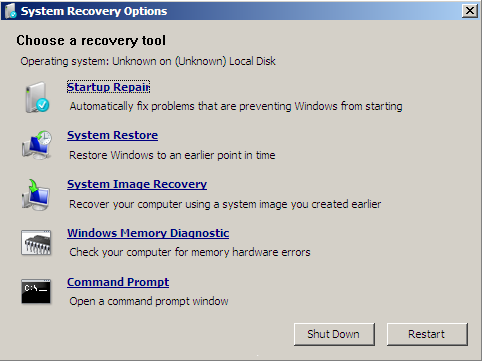
Click the button for "Use Recovery Tools"
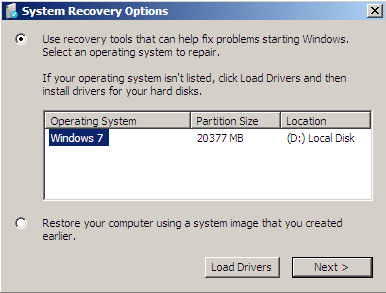
Click on StartUp Repair
The system will automatically restart. If required, you'll have to repeat the process 2 times.
If that doesn't help, use: http://www.sevenforums.com/tutorials/20864-mbr-restore-windows-7-master-boot-record.html
Now you'll be able to log in to windows.
Part 4: Installing Linux:
Use the method on http://www.linuxbsdos.com/2012/05/17/how-to-dual-boot-ubuntu-12-04-and-windows-7/ to safely install Ubuntu. You may have to select /dev/sda3 instead of /dev/sda2 in case you have a D: Drive
Thanks you for your patient reading. If any questions, put a comment below!
How To Convert Dynamic to Basic Partition Without Loss Of Data
This is a common issue in most of the latest HP and Vaio Laptops. These guys have the following issue:
(i) Vaio guys have used GPT-EFI configuration for their hard drives whereas the old and friendly used to be MBR-BIOS configuration.
(ii) HP guys already have enough number of primary partitions and Linux can't be installed easily (as long as you don't want wubi). So naturally, while shrinking your hard disk in Windows 7, you generally get an option to change to Dynamic Configuration. There you go! Once clicked, it is very difficult to revert back. But this is where the important use of two awesome tools gdisk and testdisk chips in.
I'll be focusing on correcting or rather 'suitableizing' your hard disk configuration for easy Linux installations and get rid of crappy partitions of which there is no need at all. I'll provide the links for the rest of the steps as we go.
The process:
Part 1: Converting GPT-EFI to MBR-BIOS. For this method, you can perform the required set of operations in windows itself. But changing hex-values of a partition while it is mounted, puff! Therefore, I'll use the live-mode of Ubuntu.
(i) Creating Live Mode USB: To use Live Mode of Ubuntu, all you need is a USB Drive having enough space to hold a 700MB file. Go through this: http://www.ubuntu.com/download/help/create-a-usb-stick-on-windows Now, that you have a bootable USB, reboot your system (Yeah, by reboot I mean shutdown and then boot, not hibernate and boot!)
(ii) Booting From USB: Now usually, one can boot from USB in Laptops easily. In Vaio Laptops, you'll have to go to the BIOS options by pressing F2. Then, you have to switch from UEFI Mode to Legacy Mode and Enable Booting From External Drives. In HP, one can boot from USB just by pressing F9 and going to Boot Menu.
(iii) Installing gdisk: Note, you should have a working internet connection in order to perform this, otherwise, you can download the required packages before-hand and store them somewhere.
Open pkgs.org

Search for gdisk

Click on Ubuntu 12.04.1 LTS

Now, if you have a 32-bit image of Ubuntu, then click on the i386 file but if you have the 64-bit image of Ubuntu, then click on select mirror.

Download the binary package.
(iv) Installing testdisk:
Google testdisk :)

Open the download page of CGISecurity

Click on Linux, kernel 2.6.18 or later (again, 32-bit=i386 and 64-bit=x86_64) Let the download complete!

Alternatively, one can download gdisk from https://docs.google.com/open?id=0B8d4Lb_KJbfdd1Yxd25ObWxub0E
and testdisk from https://docs.google.com/open?id=0B8d4Lb_KJbfdTUNTZlpjc0Q3d0k
(v) Time to open a terminal: Press the Windows Key and type terminal

(vi) Time to write some commands:
We'll basically open gdisk, go into expert mode and delete GPT partition tables and write MBR.
(vii)Now that the disk has been converted to MBR, one needs to recover any partitions that have been lost and mark them as primary. For which, we'll use testdisk.
Select Create & Press Enter

Select the hard disk in which your Windows, Recovery, etc partitions are present. In most cases it will be /dev/sda. Select proceed and press Enter

Whatever the by-default option is, select it. (TestDisk automatically detects the Hard Disk and makes the appropriate option as default-highlighted). Since the EFI-GPT Combo data-structures have been deleted by gdisk, Intel is the by default highlighted option in this case.

Select Analyze and press Enter

OK, so in the case of Vaio (after using gdisk), Partition 1 and Partition 3 are no longer needed. Because these contain info about booting from GPT-EFI partitions. Select Quick Search and press Enter

Hit Stop when all the required partitions have been displayed.

Now select the Recovery Partition & press the side arrow key until * appears. Do the same for your C: Drive. But for the D: Drive (If you have any) choose P.

This will show the list of partitions that you actually want at last. Select write and press Enter.

Everything seems to be done. The partition Structure has been written into the hard disk.

Part 2: Moving/Re-Sizing Hard Disk Partitions: This is required so that error like "This partition does not start at any physical boundary" don't occur while installing Linux.
(i) Download the GParted Live iso file: http://gparted.sourceforge.net/download.php
(ii) Download and install LinuxLive USB Creator http://www.linuxliveusb.com/ on your MS Windows computer.
(iii) From Windows, install then run the LinuxLive USB Creator program and follow the instructions in the GUI to install GParted Live on your USB flash drive
(iv) Boot From USB and follow the instructions:
Keep pressing enter until a screen similar to this appears. Now re-size the first partition and add the space before and after it. You'll get a warning message like this one, but its normal.

The layout should look like this. Then click on edit and then on "apply all actions".

Intermediary Process: First, The partition is expanded

Intermediary Process: Second, data is copied from later sectors to previous ones.

Intermediary Process: Still Copying

Intermediary Process: Almost finished copying files.

Copying finished! Hurray!

The final layout will look something like this.

Part 3: Recovering Master Boot Record of Windows. This is essential to boot Windows. The destruction of GPT-Partition tables destroys the boot info and hence it needs to be restored. In order to do this, there are many techniques available. But we'll follow the one mostly used and which is the safest. i.e. let Microsoft repair it's own product!
(i) Download the iso of the Windows 7 Version you have from :
http://forums.mydigitallife.info/threads/18769-Download-Windows-7-ISO-(Official-32-bit-and-64-bit-Direct-Download-Links)
(ii) Download and Install Windows 7 USB/DVD download tool from : http://images2.store.microsoft.com/prod/clustera/framework/w7udt/1.0/en-us/Windows7-USB-DVD-tool.exe
Run the program. Click browse to select the image file that you have downloaded.

Click on USB Device

Select Which USB Device you want to copy files to.

If there is not enough space on your USB Device, backup its data and click Erase USB Device

Wait for the process to finish.

Boot From USB. Select Install Now

Select your language & click next.

Click the button for "Use Recovery Tools"

Click on StartUp Repair

The system will automatically restart. If required, you'll have to repeat the process 2 times.
If that doesn't help, use: http://www.sevenforums.com/tutorials/20864-mbr-restore-windows-7-master-boot-record.html
Now you'll be able to log in to windows.
Part 4: Installing Linux:
Use the method on http://www.linuxbsdos.com/2012/05/17/how-to-dual-boot-ubuntu-12-04-and-windows-7/ to safely install Ubuntu. You may have to select /dev/sda3 instead of /dev/sda2 in case you have a D: Drive
Thanks you for your patient reading. If any questions, put a comment below!
14 comments:
Great Work Nehal...!!!
ThX NehaL :) GreAT POST!
Seriously awesome, but needs to be updated for Windows 8. Also it's unclear where you resized the original windows partition to make room for Ubuntu :)
thats great thanks
i have a problem
i have sony vaio e series 2010 made
runs on W7.
i made partition for linux and installed slackware 14 on sda6 swap n sda7 linux, every thing went fine and lilo also good, works fine
but when i chose windows from lilo it goes to vaio recovery ...
not able to get into windows
any solutions please ...
kimikimi9@gmail.com
regards
kumar
Thanks for sharing, I will bookmark and be back again
Sony Laptop Service in Anna Nagar
Perfect !!
Used it at my Toshiba Satellite C70-A-140 for installation of W7 + Ubuntu (dual boot) instead of W8.1 with safe boot and UEFI.
Fixed it all with GDISK + TESTDISK + GPARTED. This followed by a clean install of W7 + Ub 12.04 LTS.
So if you can't create a dualboot because of UEFI and Safe boot (thanks to Microsoft), Follow this method and you will be happy !!
I have a sony vaio that runs windows 8. I need to dual boot it with ubuntu 12.04. What to do insted of using windows 7 iso?
Hey, nice site you have here! Keep up the excellent work!
Support for HP Printer
Thank for sharing niha.. keep it up
123.hp.com/setup
Thank you for this blog post it actually couldn't have come at a better time for me !!
Envy 7645 Wireless Setup
I really like this post and found such a good information on your blog. I also visit many blogs for information but this one I got the correct information.
Regards,
Linux Online Training | Linux Training in Hyderabad | Linux Online Training in Hyderabad | Linux Online Training in India | Linux Online Training Institutes in Hyderabad | Best Institutes for Linux in Hyderabad | Linux Training Institutes in Hyderabad | Linux Training Institutes in India | Linux Online Training hyderabad | Linux Online Training India | Best Institutes for Linux | Linux Administration Training in Hyderabad
Excellent information.I like the way of writing and presenting.
123 HP Envy Setup 4529
A very interesting article. The insights are really helpful and informative. Thanks for posting.
123 HP envy7645
why is my hp printer showing offline
why hp printer showing offline
hp printer offline
how to make printer online
hp printer showing offline
my printer is showing offline how to fix
my printer shows offline
how do you change a printer from offline to online
printer is showing offline
Post a Comment